The best Monster Hunter Wilds The controller configuration can help you customize your fight and tour, which facilitates the search and field research. By making slight adjustments to some of the new mechanics, such as the focus mode, it can seriously rationalize the sometimes complex control schemes associated with weapons such as the insect Glaive, and even make moving in its Seikret feels much more intuitive.
Monster Hunter Wilds It is another step forward for the long cooperative action franchise. By offering an open world without problems full of flora and fauna, the game really changes the appearance of the fighters. You can read our complete Monster Hunter Wilds Check to find out why we have placed the game in our best list of multiplayer PC games.
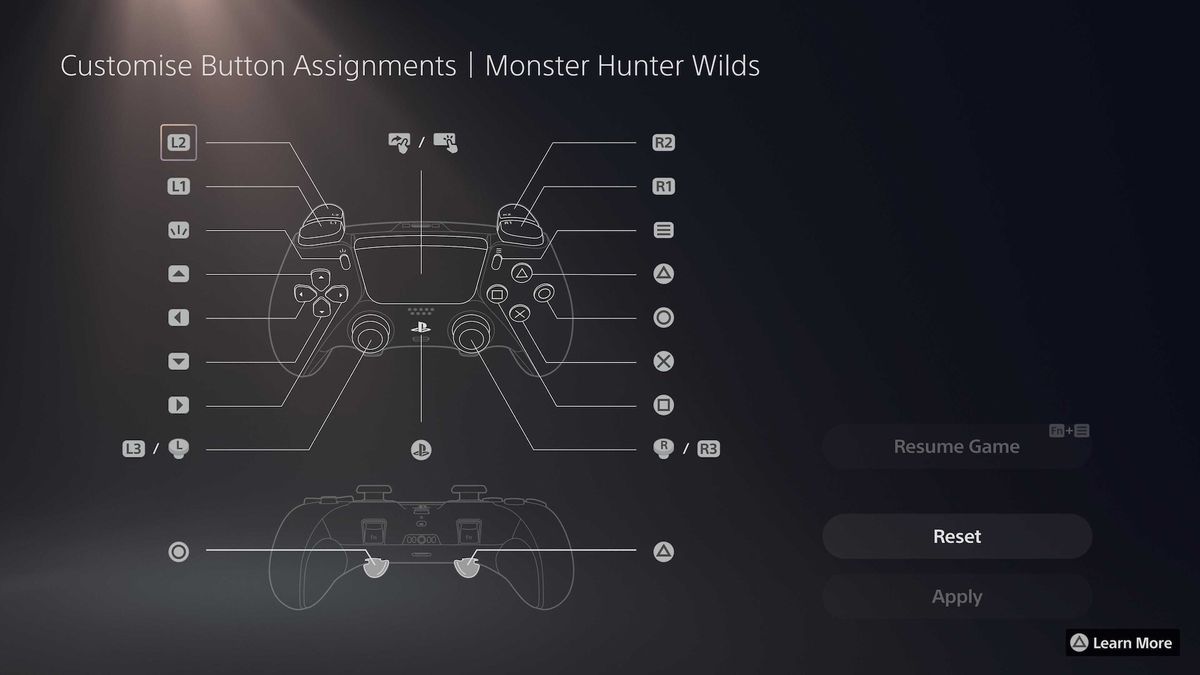
Here are the best Monster Hunter Wilds Controller configuration to change when the game is first loaded. We will cover everything from taking full advantage of additional palettes to ensure that you can always access items quickly.
Monster Hunter Wilds Best controller configuration
After spending hours playing the beta version and the main game for review, here are my recommendations for the best controller configuration for change in Monster Hunter Wilds. Then I will go into more details in each one, so that I can decide with which configuration you want to execute.
- Focus mode – Lever
- Seikret manual controls – Type 2
- Rear palette configuration (basic) – prioritize evading and body attacks
- Map zoom configuration – Deactivate
- Monster sighting chamber – Deactivate
- Duration of Retention Confirmation – Short
Focus mode (alternate)
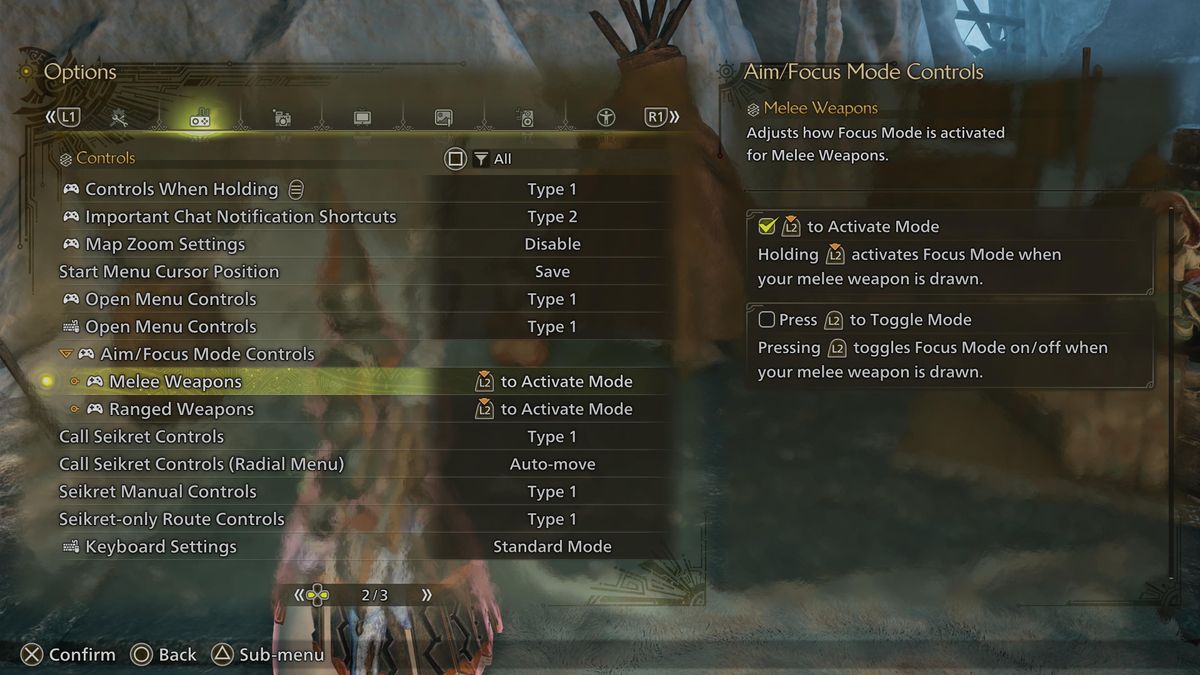
First, there are the configuration of the controller related to the focus mode. These are related to the new orientation system that is in the left trigger by default. In general, you must hold the activator to enter the focus mode, but there is an option to configure it in a lever button. This can really help with some weapons such as insect Glaive, where you will need to hold several buttons at the same time. Similarly, for weapons like the long sword, where you will usually always want to be in focus mode, this can prevent you from having to keep the trigger for most of a fight.
Seikret manual controls
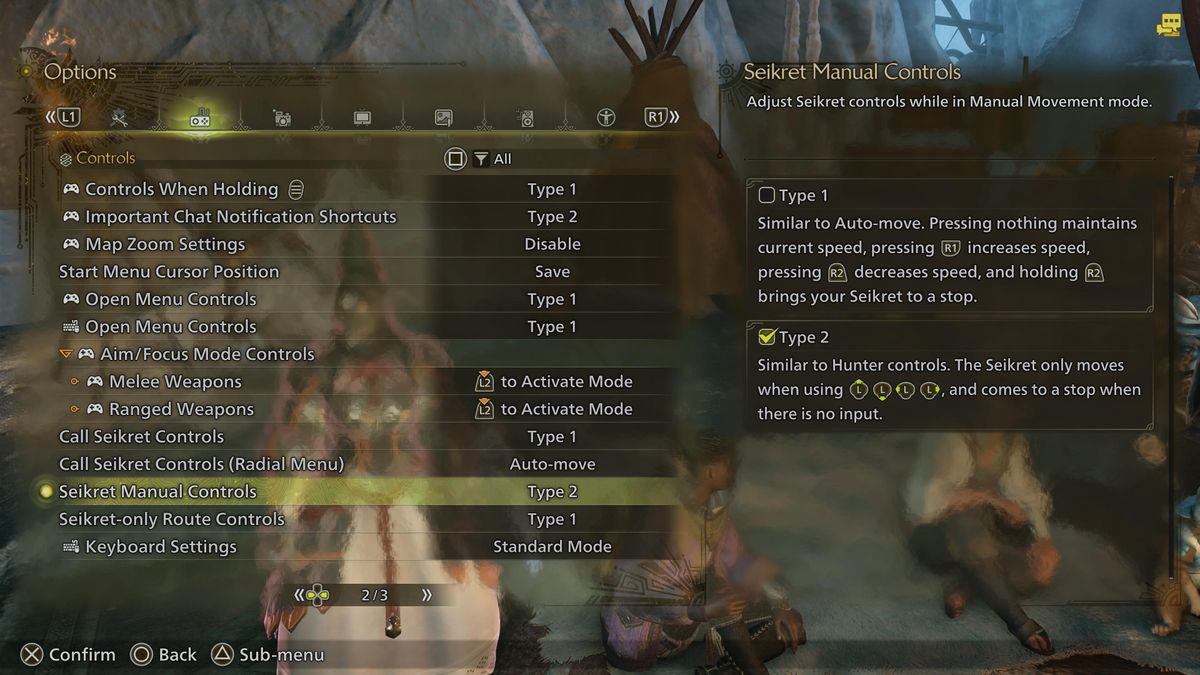
The following is the Seikret Manual Controls. This option is related to how your Seikret moves when it is not in auto-move mode. I find that having this work in type 2, which is the same as the movements of your hunter, is much more intuitive. By default, you must maintain R1/RB to accelerate, and R2/RT to reduce speed. If this feels strange to you, as you do for me, change to the other option.
Back palettes
While we are on the topic of the best controller configuration, it is worth mentioning some pallet fixations that will help those with more premium controllers such as Dualsense Edge and Xbox Elite Series 2:
- Evade – Having the Evade button (on Xbox, x on the playstation) in a rear palette can really help, since you can move the right stick while dodging, allowing you to quickly forward your target
- Attack 1 – The first of their main attacks (for users who are not weapon) will probably be in and for Xbox and Triangle for PS5. You will want this in a rear palette so you can point while you attack, without having to take your right stick thumb
- Attack 2 – The second of its main attacks can also be assigned to a rear palette for easier use. As a principal of the long sword, I find that this configuration really helps me to focus my goal while using the focus mode
- Healthy weapon – Sometimes, you will want to burst your weapon to change the use of items, or trigger environmental effects with hook.
- Sprint – Another option for a Mapphable Palette button is the sprint. This is on the left stick, click by default.
Of course, the way you set your rear palettes will finally be reduced to personal preference. For some tips on the controllers that are the most appropriate for Monster Hunter WildsBe sure to review our best controllers for Monster Hunter Wilds Guide.
Map zoom configuration
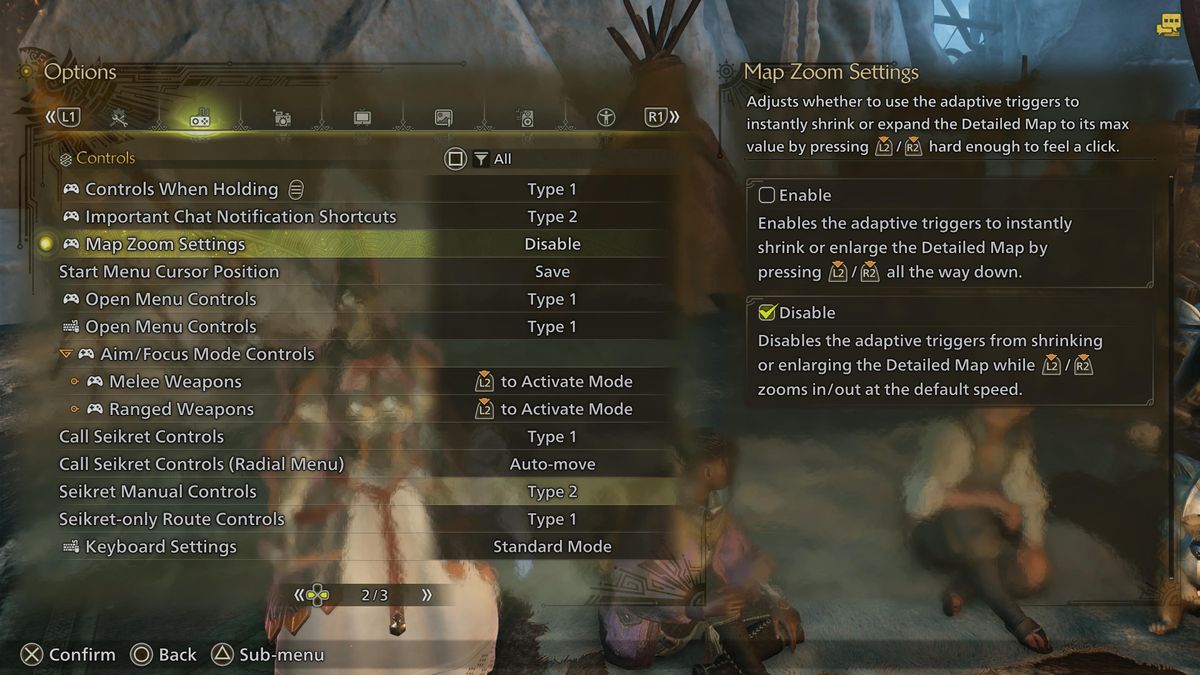
Monster Hunter Wilds It has an extremely detailed map, which reveals different points of interest depending on how zoom in you. The problem I found was that I use an adjustable activation action on my dualsense edge, so there is less press to activate them. This means that trying to approach automatically would make the map jump to the highest zoom, or the lowest zoom, which makes it very difficult to perfect what I am really trying to see. Disable this really helps, especially when combing the resource map.
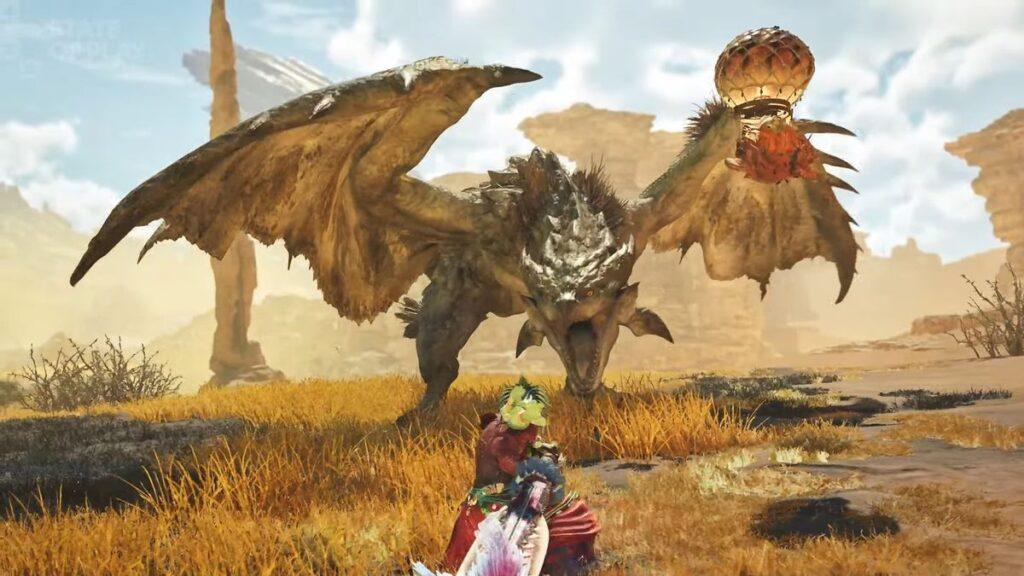
MONSTRUCTION AVISTING CHAMBER
Finally, we have the monster sighting chamber, which will expand and present a more cinematographic shot of great monsters when you find them for the first time. I prefer to turn off this, since it can lead him to lose control over the camera while leading to the battle. More than once, this has led me to lose the surprise element in a monster at the beginning of a hunt, because my character continues to move while the monster sighting chamber is active. Disable this to prevent this animation from being activated.